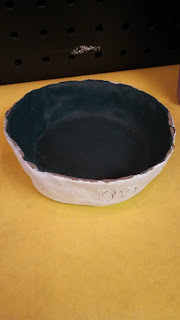
Then it was time to smooth out the pot. To do this, you needed a cup of water to dip your hand into. All we had to do was get our hand wet in the cup of water, then start rubbing and smoothing out our pot. You don't have to use a lot of water, just a little worked well. By using the water, it smoothed out all of the finger prints and cracks that were formed when we were pinching the pot.
Next we carved symbols into the clay using small wooden tools that looked like large toothpicks. The symbols had to represent things that are important to us. I did a heart to represent the love for my family and friends, a fish and pole to show my love of fishing, flip flops because I love to wear them and hate socks, a flower because I love to garden and an ice cream cone because that is my favorite food.
Now it was time to paint our pots. It was great that we could paint them when the clay was still wet. We used acrylic paint so it didn't crack, like tempera paint. I mixed blue and yellow and white to make a green color for the inside of my pot. I used white for the outside. I had to make sure I didn't get a lot of paint inside my carvings. After I was done painting, I used the carving tool to get any paint out of the carvings.
An extension activity would be to study cultures that made clay pots for their own use or to sell to others. You could also study cultures that used symbols in their art work or to tell a story. It would be a really fun social studies unit!

No comments:
Post a Comment