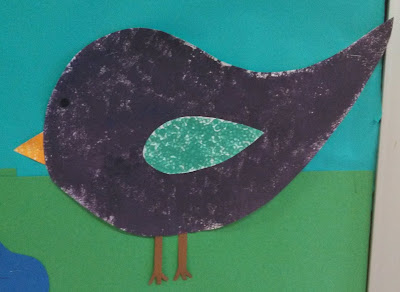
This lesson was taught by Molly and Brittany. Their lesson focused on print making. The first step to their lesson was to think of something that dealt with spring. I chose a bird. Then I had to draw the bird on a 12" x 18" piece of construction paper. I drew the parts of my bird separately rather than making it all one picture.
The next step to this project was to pick 3 items that would create different textures on my bird. The items we could choose between were: marshmallows, Q-tips, sponge, cardboard, toy cars, cups and forks, golf balls. I chose to use a sponge for the body, Q-tip for the wing, and cardboard for the beak.
Next we were given acrylic paint. My partner and I chose to mix colors to create colors other than the primary colors we were given. I mixed blue and red to create the purple. I used red and yellow to make orange for the beak. And I mixed blue and yellow to make green then added more blue and white to create the wing color.
Then we dipped our texture items into the paint and covered our drawing. We were supposed to leave some white space to help you see what items you used. I may have used too much paint on mine. Once I was done painting and it dried, I cut and glued my beak, wing, and construction paper legs onto my bird's body.
An extension activity is to incorporate math. You could teach the students about patterns that happen when you create this picture. If you used the car, the tires would have created a pattern.

No comments:
Post a Comment